Tuesday, October 23, 2018

Peek-A-Who Blog Hop & Give Away


Welcome to the Peek-A-Who blog hop, hosted by Marian at Seams To Be Sew!

And we have great giveaways! See the rafflecopter at the end of the post to see what you need to do in order to enter, as well as a list of the shops participating.

Well, my birthday is October 30, the day before Halloween.  Actually, I was born at midnight and the midwife asked my mother whether she wanted it midnight or 12:01 am and my mother said midnight.  So, I am as close to a Halloween baby as a person can be without actually being one!  You would think this would make me love Halloween, but I think it has done the opposite.  But I do love autumn with the gorgeous leaves against the clear blue sky (yes there are a few glorious days like this in the fall in Minnesota), so I guess I wanted to focus on that.

Sooo... I made a really cute table topper from a pattern I got a year or so on a blog hop.  It was very cute and it featured wool pumpkins on a pieced 36 patch of various orange squares.  

Such a fun 36 patch!  Modern fabrics made it more fun... 


It is such fun to work with the wool and add a few little bits of embroidery to make it extra special.  There is one thing I am disappointed about it though, I didn't think about the directional fabrics and I messed up the outside part of the block.  But I still like the table topper even though it is a bit wonky.


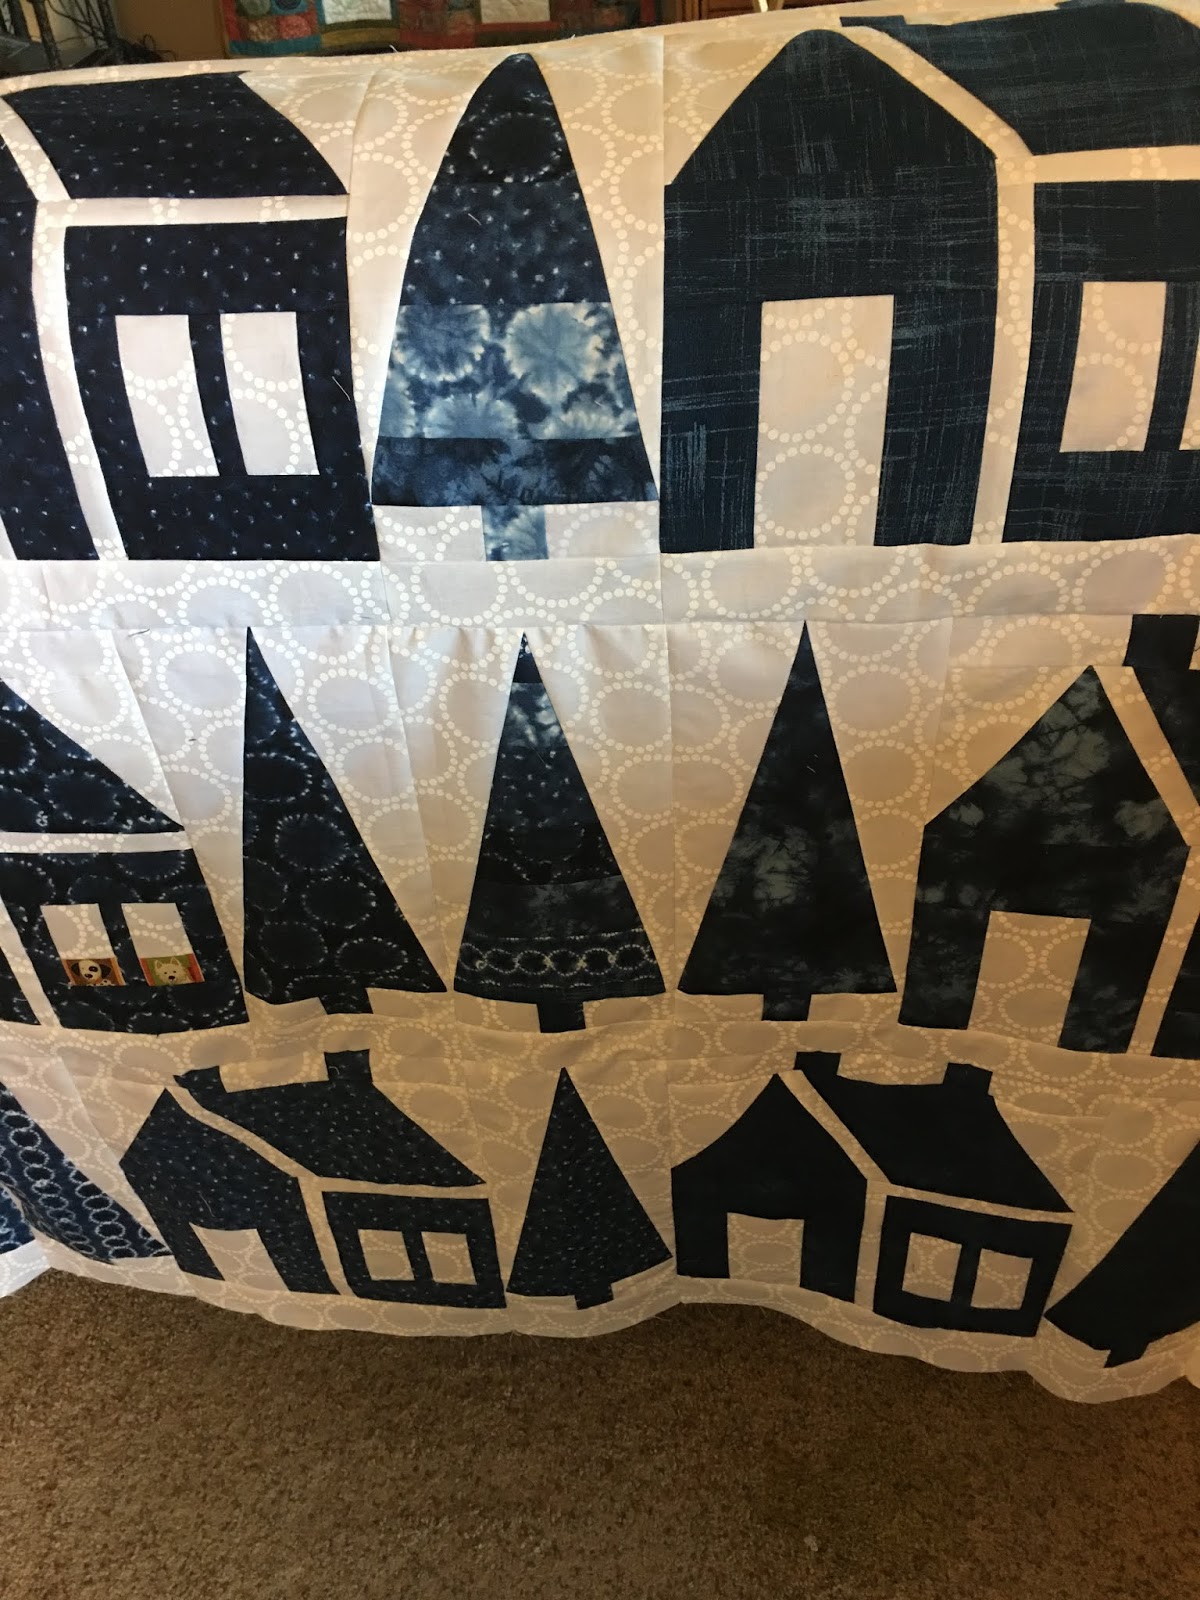
And if you look carefully at the quilt on the quilt rack, you can see a nose of my dog Chloe peeking out.  Perfect timing for the Peek A Who Blog Hop, I guess on this blog Chloe is the Peeker.

Sunday, September 16, 2018

And the winner is...

And the Winner is #20 of the people who posted a response to my blog post Friday.  I used a random number generator to get number 20 who is Sharon A.  I have sent you an email Sharon so please send me your address and I will get your present out in the mail.  Congratulations Sharon!


I also wanted to tell you about the pines in my quilt.  


See the three pines in the center of the quilt?  This was my "shout out" to the books of Louise Penny whose mysteries center on the small village of Three Pines.  I love her books and encourage anyone who likes quiet but compelling mysteries with great character and suspense building to read any of her books. 

Always, Kay

Friday, September 14, 2018

Welcome to my house blog hop!


Hi

It is my day for the Welcome to my house blog hop!  Wow, there have been tons of great ideas, wonky houses, appliqued houses, stylized houses, and old fashioned houses.  Please check out all the links at the bottom of this page to see what all the other bloggers have to say about their houses!  And read all the way to the end for a chance to win a prize.


For me, there are a few people who I always gravitate to for patterns.  One of them is Bonnie Hunter whose pattern you can see in a previous post.  Another is Edyta Sitar of Laundry Basket Quilts, which is the designer of the quilt I made for this blog hop.


I chose a quilt called Blue Barns from her "Patches of Blue" book.  They look like houses to me and I love the simple modern look of the one color.  However, I made it a much smaller wall hanging and I did it out of a line called "indigo" but I am not sure of the manufacturer or the designer, but I just knew I loved it.  If you are interested, drop me a note and I will go back to Quilt Cove in Eagan and ask Sue.  I also used white Pearl Bracelets for my background and I ran out midway, I guess because I wanted to add more trees, so I had to go on a search and could only find one more yard in an Etsy shop.  Just enough to make it.


I really love how this quilt turned out.  I varied the number of trees between the houses and made some of the trees out of strips of all the fabrics.  


I also personalized it just a bit, I put two dogs, Lucy and LuLu, in the windows of one house and a cat, Teyla, in the window of one of the other houses.  I think the quilt looks elegant but it was actually fairly easy to make.

Now, I have to think about how to quilt it.  I may just do a swirly in the white areas because it is a wall hanging so it doesn't need to have a lot of "holding it together" and because I don't want to have to change thread every few inches.  But, I certainly am open to suggestions on how to quilt it...  Should I just outline the houses, windows and trees in the white areas? Would that be enough or do I need to also do something else.?  I always struggle with quilting.

Please visit the rest of the blogs listed below to see all the other great projects, and if you leave me a comment, I will enter you into my personal drawing for a charm pack of beautiful Christmas blenders, just in time for a great project to give or to keep!  I would love💖 it if you also followed me, I honestly love to blog and I love to hear what everyone thinks.  Thanks for visiting.


September 10
September 11
September 12
September 13
September 14
Thanks for visiting.  Always, Kay


Thursday, August 23, 2018

Fabulous Freebies Blog Hop - My Day!!!


So, this is my project for the Fabulous Freebies Blog Hop.  It is a Bonnie Hunter free quilt and well, it is called "My Blue Heaven", (found here) but it isn't so blue, is it?  Well I decided to make my version scrappy so I pulled out my Kim Diehl scraps and fat quarters and went to town to create fabulosity in the:

The first thing I did was pull out my Accuquilt Go and I decided that I could cut all of the pieces with my 8" Cube Dies.  Yay!!!

The first step was to take all the quarter square triangles to make (wait for it) 90 hourglass squares from the 360 quarter square triangles.


True to Bonnie Hunter lots of pieces quilts, I took a whole bunch of the same but different quarter square triangles from my neutrals and the colorful half square triangles and took 90 times 4 and made 360 flying geese.  But I forgot that only one of the two squares in the quilt use flying geese so I actually made 180 too many.  I decided that instead of making more hourglass units for the border, I would use these flying geese instead.  So, no waste...


Next step was to take four flying geese, and four half square triangle blocks and attach them to half of the quarter square triangle blocks and create these beautiful star blocks.  Then for the second set of blocks, 


four rectangles and four squares were attached to the rest of the hourglass blocks.

Yay, now I was ready to put them together.  Nine columns and ten rows, alternating each block.


I really like the way this has turned out.  I especially like the way each block is framed in an opposite manner.  


See how in the picture on the left, the blocks in the corner turn away while in the star block, they turn in or enclose the star.  Makes the entire quilt have a lot of movement.  This is all the further I have gotten on the project.


I hope you have enjoyed my freebie.  I think it makes a great quilt.  Please also visit my fellow "freebie blog hoppers" from the list below.  There are a lot of great projects to be made!!!!

Monday August 20

Thursday, August 9, 2018

Taking pictures of my quilts

I have decided to put my quilts up for sale.  I signed up with Amazon Handmade and then started to work on getting some good pictures.  My dear hubby built a complex but wonderful quilt frame to hold them up outdoors to take pictures.  So, well I have some pictures!


It was super sunny that day so I guess I am squinting a lot but you get the picture!!!  Although you can see the clips and bars at the top, you can't really see any more of the frame which had to be pretty sturdy to hold some of the larger quilts.

Check out Amazon Handmade to see more of my quilts for sale, well, give me a bit of time to get them all up...  

Coming soon is the Freebies Blog Hop and I am very busy making a quilt for that, because of course I took on a difficult pattern.

Have a great week.  See you at the Blog Hop next week. 

Always, Kay

Friday, July 27, 2018

Christmas in July Blog Hop


Well, it is Christmas in July Blog Hop Time and today is my day!  I thought long and hard about what I wanted to do for this hop and I found this panel I bought last year because I loved the chickadees so much and the tealish background with the green and red holly was so pretty.  Well, I have to admit that I bought 3 panels and was thinking about making a quilt, but I decided I really didn't want to do that now.  So, what to do with three big quilt panels???  Use them for Christmas in July!


I wish to thank Carol from justletmequilt.com for hosting this blog hop.

I began by cutting apart all the "pieces" of the panel down to each individual component, except I kept the middle section of one of the panels intact.


This section was going to be left as it is.  I then proceeded to put fusible fleece on the back although I am not sure now why I did that.  It did turn out really nicely though after quilting...


Next I started resewing everything back together, but in totally different ways.


You are probably getting the gist of what I was making now, a table topper with four placemats, two of the bird with berries and two with the birds on the pine tree.  I then applied fusible fleece to these.

But, I was not done yet...  My daughter is always asking for those kitchen towels that have the flap that buttons over the top so she can put it on her stove.  I found a cute red checkered towel that was in my stash and decided to cut it in two to make two towels.


Gathering and attaching it to the front of a panel piece, I then sewed the "inside flap" above this piece.  Then sewing together the front and back outside flap right sides together, I pinned the flaps together folding a quarter of an inch up for the back side, I sewed the three sides together, turned the flap right side out and stitched down the opening through the two flaps and the toweling.


At this point, I was ready to find a button and make the buttonhole.


I knew I would find something in my button box, and so I did.  I decided upon the deep red.
 

I had never made a buttonhole with my Bernina before, and I tried just "winging it" and ended up taking the entire thing out.  I found my manual, followed the instructions, and OMG it was so easy.  I will have to remember look things up in the instructions.

Anyway, I loved it!


All that was left was to quilt and bind the placemats and table topper.  I used a soft and white batting in between (and yes, this is the time to wonder why I used fleece on all the pieces) and did echoing around all the designs in the pieces.  I think this turned out great and I am really proud of it.


And the final project (Don't tell my daughter because she will be getting this for her birthday):


Happy Christmas in July!  I hope you have enjoyed my project.  Please look at all the other bloggers' posts for other great ideas!

There's a ton of amazing talent among the hoppers.
Be sure to visit them all and leave a sweet comment...it will be appreciated!

July 23


July 24 


July 25


July 26


July 27


Always, Kay


 PS.  Leave a comment below for a chance to win a Fons and Porter Half and Quarter Square Ruler.


Peek-A-Who Blog Hop & Give Away

Welcome to the Peek-A-Who blog hop, hosted by Marian at Seams To Be Sew ! And we have great giveaways! See the rafflecopter at the end o...